Straight, accurate movement is far from easy.
Straight, accurate movement is far from easy, and linear positioning devices prove it by erring in not one, but three dimensions
Just when you thought you had the “linear motion” concept nailed down – hit the required points on the straightaway and you’re home – along comes the remaining five degrees of freedom to crash the party. From a coarse perspective, it’s true, a linear carriage translates mainly along one axis (call it the X axis), but all engineered parts have imperfections, and with our ever-increasing need for accuracy and precision, our attention to detail must also progress accordingly.
To thoroughly describe system accuracy, then, we must account for all six degrees of freedom, these being translation in the X, Y, and Z axes, and rotation about the same.
Concerns of placement
For starters, let’s establish a clear definition of the key positioning parameters. Even though most engineers are familiar with the terms accuracy, repeatability, and resolution, they are commonly misused in practice. Accuracy is the most difficult of the three to achieve, followed by repeatability and, finally, resolution. Accuracy explains how closely a system in motion approaches a command position, an exact position lying in theoretical X-Y-Z space.
Repeatability or precision, on the other hand, refers to the error between successive attempts to move to the same location from random directions. A perfectly repeatable linear system can be highly inaccurate – it might be capable of continually achieving the same location, which happens to be well away from that which is commanded. As an example, a lead screw with a heavily preloaded follower nut, but with significant pitch or “lead” error, could have good repeatability together with poor accuracy. The preload keeps the nut rigid in its axial position, reducing or eliminating backlash and ensuring the nut and load travel consistently according to screw shaft rotation. But the pitch error throws the intended rotation-to-translation relation off kilter, so the system is inaccurate.
Resolution is the smallest move increment that can be realized. If, for instance, the command position lies 2 μm away but the resolution of the system is 4 μm, accuracy can be no better than 2 μm. Under these circumstances, the system doesn’t have the resolution to move in on the desired position any more closely.
For a system to be accurate, all of its components must be accurate, repeatable, and offer sufficient resolution. Although a system may provide good “lead” accuracy but poor repeatability (that is, the system forms random scatter about the command point) the overall system accuracy cannot be better than its repeatability.
Guided measures
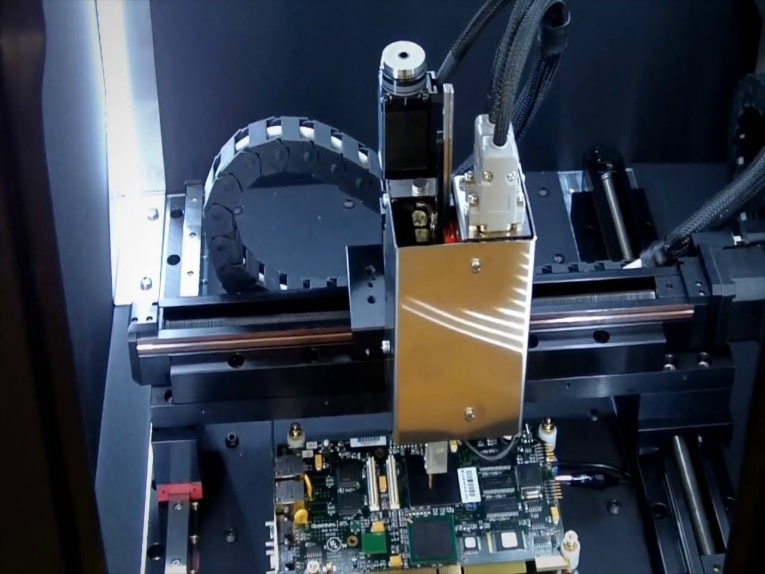
Linear motion devices consist of two essential components, a linear guide and a device to produce thrust. The guide is responsible for restricting motion in 5 of the 6 degrees of freedom available in three-dimensional space. The ideal guide allows no translation in the Y and Z axes and no rotation about any of the axes whatsoever. The thrust device (commonly a lead or ball screw) is, of course, expected to produce motion only in the unrestrained axis. It is convenient to evaluate the accuracy of these two components separately and then combine the results to determine the overall accuracy.
Let’s look to the guide first. A linear guide may suffer from several sources of error: curvature up and down or side to side – in other words deviations in flatness and straightness; vertical runout; and discontinuities between guide and follower.
Flatness and straightness are the most common concerns, as they are generally greatest in magnitude. A perfectly made guide travels along a plane parallel to the X-Y plane and, furthermore, along a line parallel to the X axis. Flatness error is essentially deviation from the X-Y plane. It may encompass simple curvature in one or two directions. Flatness error always creates translation in the Z (vertical) axis. Depending on the orientation of the curvature, it may cause pitch rotation about the Y axis, roll about the X axis (the case with two-dimensional warp), or both. Warp may also generate slight translation in the Y axis, perpendicular to the desired motion.
Straightness error results in the carriage’s line of travel leaving the parallel with the X axis, curving into the ±Y direction. Besides displacement in the Y axis, it will induce a yaw rotation about the Z axis.
Vertical runout is a systematic change in the height of the linear guide as it translates. This may be due to inaccuracies in the manufacturing of the bearing surfaces, creating translation in the Z axis. Most guide manufacturers list flatness or vertical runout, along with straightness. It is possible for a linear guide to induce instantaneous Y or Z translation without rotation, but the magnitude of these is usually small. The linear guide follower tends to distribute the imperfections along its length, suppressing sudden shifts transverse to the desired motion.
The effect of rotation on accuracy depends on where the point of interest is relative to the position-referencing device, which is perhaps the lead screw itself or a linear scale used for feedback. In either case, the location of the device forms the line of measurement, parallel to the desired move direction. The point of interest, however, which is the target point of the linear motion system, may be offset from the line of measurement. Any rotation, therefore, will cause different arc lengths at each. And, the actual move distance will vary from the distance registered on the scale according to the amount of rotation and the offset. The larger the offset, the greater the translation errors due to rotations – known as Abbé error. With the lead screw itself used as the referencing device, the line of measurement is on-center. But linear encoders are typically used, and are mounted to the side. This could worsen or improve the conditions for Abbé error, depending on the location of the point of interest (it isn’t always aligned with the carriage and lead screw).
In contrast, pure translation errors in the Y and Z axes due to discontinuities and vertical runout remain constant regardless of the point of interest. Errors from rotations can be far more deceiving. It is generally easier and more cost effective to minimize offset than to build a positioning system with more precise guides.
Driving error
Thrust can be produced in many ways. Common high-precision devices are lead screws, ball screws, and linear motors. Lead screws and ball screws create a specific type of error intrinsic to their nature. As the screw rotates, the follower travels on a helical path converting rotary motion to linear. Since the helix angle is never perfect, under- or over-travel is to be expected. This can be cyclical (known as 2π error) or systematic (measured as average error per 300 mm of travel). There may also be intermediate frequencies of oscillation or travel variation. The average error can be easily removed with controller compensation. The intermediate and cyclical errors become quite difficult to remove. A precision ground screw of class C3 will have an average or systematic error of 8 μm and a 2π error of 6 μm. With lower-precision screws, the 2π error is not reported as it is insignificant in relation to the average error. Average “lead” error is listed for all positioning-class lead screws.
A lead or ball screw may be used together with a linear encoder in order to feed the actual position back to the controller. This eliminates the need for ultra- high accuracy in the screw’s thread form. Scale capabilities and control loop tuning are then the limiting factors for linear accuracy.
Linear motors regulate motion based on feedback from a linear encoder or other such sensing device. The feedback device’s accuracy and resolution will limit system accuracy, as will system tuning, an important player in any servo application. A dead band is chosen for tuning, such that once the carriage reaches a position within this range, it stops hunting. This decreases the settling time but also diminishes the repeatability and resolution of the device. Nevertheless, since there are no intermediate mechanical elements to introduce system backlash, stiction, deflection, and the like, linear motors are capable of surpassing the accuracy of a lead or ball screw driven system.
Sum of the parts
To determine overall accuracy along one axis of travel, guide and thrust device errors must be combined. Rotational errors are converted to translational at the point of interest. This error may then be combined with other translational errors in the same direction.
Abbé error is calculated by multiplying the tangent of the total angle change about the axis of rotation by the offset distance. For each rotation, the offset should be taken in the plane perpendicular to the axis of rotation. The only way to virtually eliminate Abbé error is to position the feedback device at the point of interest.
Once the guide’s translational errors are calculated in each direction, they can be combined with the error from the thrust device, which contributes to error along the X axis only, and the total system error is quantified.
If you are analyzing a single-axis linear motion device, you can simply compare translational errors for each direction with your positioning requirements. If any axis has unacceptable error, you can address that axis’ error components one at a time.
If the system is multi-axis, with several linear motion assemblies, you still have only one point of interest; it’s the same for each axis. The furthest axis from the point of interest will have the highest potential for Abbé error. Translation errors from each stage can be summed at the point of interest to determine total system error. However, orthogonality between the axes must also be considered now. This produces a pure translation. In the case of an X-Y stage, for instance, a skew of the Y axis with respect to the X will produce an additional X translation as the Y axis traverses. This can be determined with trigonometry or by directly measuring the offset. Remember, unlike rotations, translations are independent of the offset, the distance to the point of interest. You can add the orthogonality offset directly to your overall error budget.
Finally, bear in mind that the term “accuracy” is used rather freely, and can often be left open for interpretation. Sometimes the cited accuracy specification accounts for the positioning screw only. This type of sketchy representation can be misleading. For example, a designer might think to improve system accuracy by improving average lead error, when the problem is actually grounded in Abbé error. Not the optimum approach. Many times there is a simple and economical geometric solution, once the error source has been identified.
Post time: Dec-21-2020


